
How to Transport Fish When Moving

How to Transport Fish When Moving: Expert Guide to Safe Aquarium and Live Fish Relocation
Moving an aquarium and live fish takes planning — sudden shifts in water chemistry, temperature, or oxygen can quickly stress or worse, kill, your fish. This practical guide walks you through preparing your fish and gear, choosing the right transport containers, disassembling and packing tanks safely, moving empty tanks and live fish during transit, and reassembling and acclimating your fish at the new home. You’ll get clear checklists (fasting, water testing, supplies), container recommendations (bags, buckets, coolers), a step-by-step packing and reassembly sequence, plus species-specific tips for freshwater and saltwater setups. The goal is to lower stress and mortality on short drives and longer relocations — and to explain when it makes sense to bring in professional movers. If you want help with the heavy lifting, Mountain Movers ATX is a family-owned Austin, TX moving company known for dependable, low-stress moves and transparent pricing — we can pack and transport empty tanks and heavy equipment so you can focus on the fish.
What Are the Essential Preparations for Moving Live Fish Safely?
Good preparation reduces fish stress and preserves the beneficial bacteria that keep your water healthy. Start by checking fish health and recent feedings, test water chemistry, and assemble transport supplies ahead of time so you’re not scrambling on move day. Plan timing to avoid extreme heat or cold and think about travel time to choose sealed bags, buckets, or an aerated cooler. These steps help prevent ammonia spikes and temperature shock — the most common causes of harm during relocation — and set you up to prepare fish and aquarium water and gather the right supplies.
How Should You Prepare Fish and Aquarium Water Before a Move?
Most fish should be fasted 24–48 hours before transport to cut waste and ammonia production; sensitive species (for example, some cichlids) may need a shorter fast. Test ammonia, nitrite, nitrate, pH, and temperature within 24 hours of moving and fix any issues: do partial water changes to reduce ammonia/nitrite, stabilize pH to a range safe for your species, and add a water conditioner to neutralize chlorine or chloramine. Whenever possible, keep filter media moist — moving a cartridge or sponge in a sealed bucket of tank water helps preserve beneficial bacteria. These actions lower chemical stress during transit and lead into assembling the supplies you’ll need for transport.
Which Supplies Are Needed for Secure Fish Transport?

Having the right supplies on hand protects your fish and reduces surprises on moving day. Essentials include transport bags, 5-gallon buckets with tight lids, insulated coolers, oxygen or battery aerators, water conditioner, nets, towels, and sturdy boxes for equipment. Labeling materials, tape, and a thermometer help with monitoring and handling; spare batteries and a small fish first-aid kit (aquarium salt, dechlorinator) are smart backups. The right gear makes transport predictable and helps you pick the best container and oxygenation method for your trip.
Quick reference: supplies for moving live fish, their purpose, and suggested quantities.
These supplies build redundancy for delays or problems; next, compare container options to pick the best method for your move.
What Are the Best Methods and Containers for Transporting Live Fish?
Container choice depends on trip length, species sensitivity, and the number and size of your fish. For short drives (roughly 1–2 hours), oxygen-flushed transport bags work well for small to medium fish — they’re lightweight and provide good short-term gas exchange. For longer trips, aerated 5-gallon buckets or insulated coolers hold oxygen and temperature more reliably and let you run an aerator. No matter the container, secure lids, padding to prevent tipping, and temperature control are essential; those factors affect oxygen retention and stability and lead into a practical bags vs. buckets comparison.
How to Choose Between Fish Transport Bags and Buckets?
Transport bags are great for quick moves and small groups: they’re inexpensive, compact, and easy to handle. Use heavy-duty, oxygen-flushed bags and don’t overfill — a rough guideline is one small-to-medium fish per 2 liters of water, depending on species. Buckets or coolers are a safer bet for longer travel or larger numbers of fish: they resist punctures, accept aeration, and keep temperature steadier. In short — pick bags for short, local moves and buckets/coolers for extended trips or when you’ll run an aerator.
How to Maintain Oxygen and Temperature During Fish Transport?
Oxygen and temperature are the two variables most likely to cause acute stress. For trips under 1–2 hours, oxygen-flushed bags usually suffice. For trips longer than 2 hours, use battery aerators or oxygen cylinders if you can. Wrap buckets or coolers with towels or reflective blankets to steady temperatures and use heat or cold packs carefully in extremes, keeping temperatures within species-safe limits. Keep a small thermometer handy and plan contingencies — short rest stops with aeration or a quick temperature check can make a big difference.
That comparison explains why bags suit short moves and buckets/coolers are better for longer trips. Next up: how to break down and pack your aquarium.
How Do You Disassemble and Pack an Aquarium for Moving?
Disassembling an aquarium is about protecting fragile glass while preserving biological filtration — similar care to packing paintings, where delicate surfaces demand thoughtful handling. Follow the right order — partial water removal, transferring fish, disconnecting and packing equipment, then securing the empty tank — to minimize contamination and breakage. Handle substrate and decorations carefully and keep some filter media moist to preserve bacteria; moving a cartridge or sponge in tank water helps speed cycling later. These steps shorten downtime for your aquarium's ecology and prepare you to pack each component safely.
What Are the Steps to Safely Break Down Your Fish Tank and Equipment?
Use a clear, consistent sequence: first test and stabilize water and fast fish if needed; second, move fish into prepared transport containers; third, save some tank water in sealed, labeled jugs if you plan to reuse it; fourth, bag filter media in tank water to keep bacteria alive; fifth, disconnect and label electrical gear, coil cords, and pack small parts in sealed bags. Each step preserves useful bacteria and prevents damage — label everything to make reassembly straightforward — and this order leads into the best packing approaches for fragile pieces.
Quick checklist for breaking down an aquarium:
- Test and stabilize water: Correct ammonia, nitrite, and pH before any transfers.
- Fast fish: Stop feeding 24–48 hours before transport to reduce waste.
- Transfer fish: Move fish into bags, buckets, or coolers with oxygen or aeration.
- Preserve filter media: Keep sponges or media moist in tank water for re-use.
- Drain and pack: Partially drain tank water, remove decorations, and pack glass with heavy padding.
Following this sequence protects fish and hardware and prepares you for packing techniques that reduce equipment damage.
How to Pack Aquarium Components to Prevent Damage?
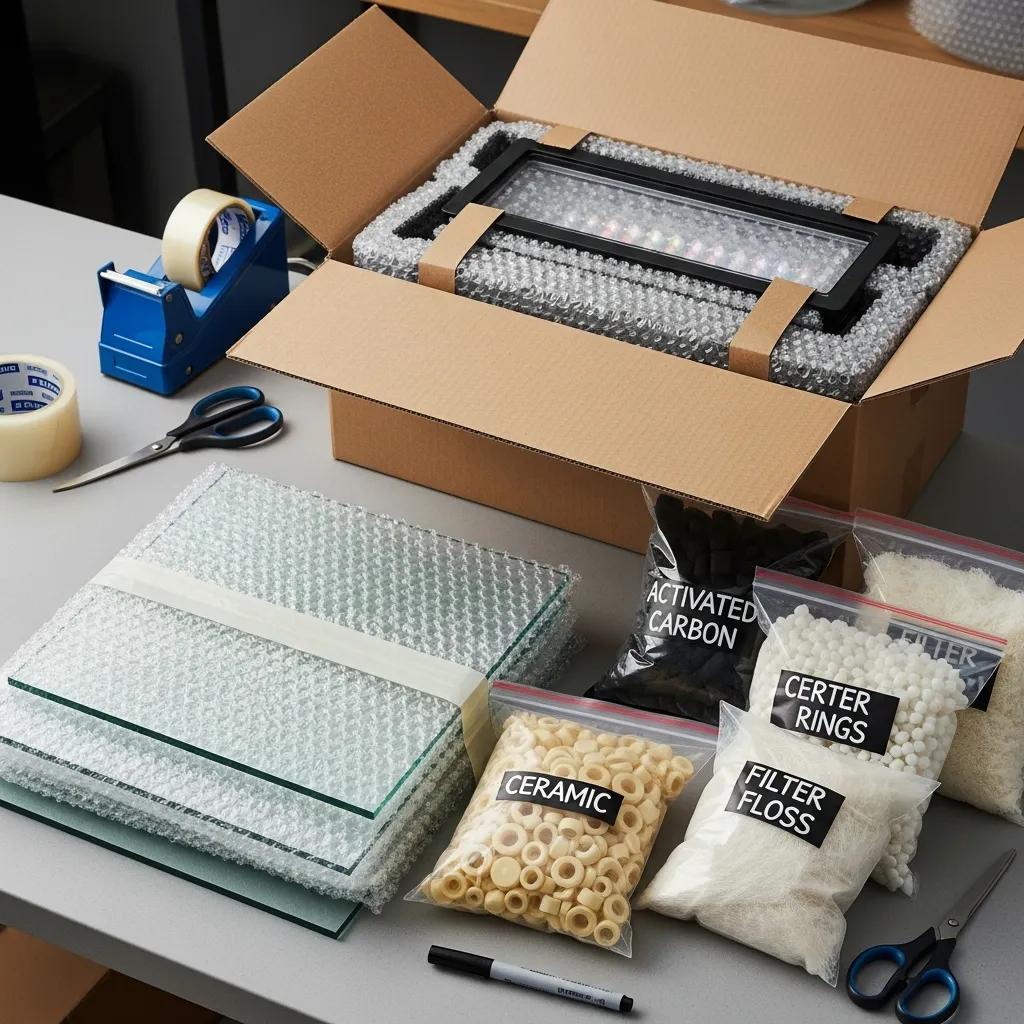
Sort items by fragility and function: wrap glass panels and hoods with thick padding and place them in rigid boxes; clean, dry, and wrap electronics and label cords separately; seal liquids like conditioners and pack them upright to avoid spills. Use bubble wrap, foam, and boxes slightly larger than the item to prevent crushing, and add absorbent towels or silica gel for residual moisture. Put screws and small fittings in clear, labeled bags so nothing gets lost during reassembly. Good packing lowers breakage risk and speeds your restart after the move.
Packing tips for aquarium components:
- Wrap glass panels and hoods in two layers of bubble wrap and moving blankets.
- Place filter cartridges, sponges, and heaters in labeled, sealed plastic bags with instructions.
- Pack lights and electronics upright in small boxes with foam padding and include spare bulbs in padded sleeves.
These measures cut breakage risk and make vehicle loading and mover coordination smoother.
This table clarifies handling priorities and leads into best practices for transporting gear in the vehicle.
How Should You Transport the Aquarium and Live Fish During the Move?
Moving fish and an empty tank at the same time takes coordination to avoid temperature swings and glass damage. Secure empty tanks upright on a flat, supported surface with padding and straps to reduce lateral pressure and vibration; place tanks against a flat wall or on a pallet to support the base. Whenever possible, have live fish travel inside the vehicle cabin where temperature and oxygen can be monitored; if they go in the moving truck, keep them in insulated coolers and make sure you can reach them at stops. Clear communication between the person handling the fish and the moving crew prevents rough handling and sets expectations for unloading and reassembly.
What Are the Best Practices for Moving an Empty Aquarium Tank?
Support an empty tank so it doesn’t flex or take edge pressure: place a foam or plywood base underneath, keep it upright on its long edge if needed, and secure it with straps and moving blankets to stop sliding. Don’t stack heavy items on top and distribute weight evenly in the truck to avoid torsion. Use two or more people when lifting, keep the tank vertical, and pad corners and rims thoroughly. These precautions reduce the chance of cracks and make setup at the new home safer.
How Can Professional Movers Assist with Aquarium and Fish Transport?
Professional movers can handle heavy lifting, pack and protect fragile items, and position empty tanks securely in the truck using blankets, straps, and the right placement. Most residential movers won’t transport live animals because of liability and welfare concerns, so owners usually move live fish themselves or hire a licensed pet transporter. Mountain Movers ATX, a family-owned Austin company serving Central Texas, offers packing services and careful handling of heavy or fragile items, making them a useful partner for moving empty aquariums while owners manage live-fish transport.
- What movers handle: Packing, loading, securing, and transporting empty tanks and stands.
- What movers usually avoid: Direct transport of live animals due to welfare and liability concerns.
- How to coordinate: Communicate timing, loading order, and where the owner will travel with fish.
Good coordination reduces stress for your fish and the moving team and gets you ready for reassembly and acclimation at the new home.
How Do You Set Up Your Aquarium and Acclimate Fish in the New Home?
Reassembling the aquarium in the right order helps restore biological filtration and limits post-move ammonia or algae blooms. Start by placing the tank on a level, secure stand, add substrate and equipment in the original order (mechanical filtration first, then biological), and refill with conditioned water that closely matches transport water. Return filter media from the old tank to preserve beneficial bacteria and monitor ammonia, nitrite, and nitrate closely for the first 72 hours. Once equipment and parameters are stable, acclimate fish with a drip or gradual mixing method to avoid osmotic and temperature shock and resume feeding as appropriate.
What Is the Process for Reassembling the Aquarium and Cycling Water?
Prioritize biological filtration during reassembly: install the filter and return old media first so beneficial bacteria remain active, then power mechanical filtration and heaters to reach the target temperature and flow. Refill slowly with dechlorinated water to avoid disturbing substrate and decorations, and use saved tank water when safe. Consider bacterial supplements or seeding media from the old filter to speed recovery. Test water right away and again at 24, 48, and 72 hours to spot any ammonia or nitrite rises and decide whether partial water changes or reduced stocking are needed.
How to Acclimate Fish to New Water Conditions Safely?
For sensitive species use drip acclimation over 30–60 minutes: run airline tubing from a bucket of tank water into the transport container and slowly mix until volumes double or triple. For hardier community fish, add small cups of tank water to the transport bag every 5–10 minutes for 30–45 minutes. Match temperatures within about 1–2°C before final transfer and avoid sudden pH swings; if conditions differ greatly, acclimate more slowly. Watch fish for signs of stress after transfer and be ready to isolate severely affected individuals in a quarantine tank for recovery.
Simple acclimation steps:
- Temperature match: Ensure transport water and tank water are within a narrow temperature range.
- Drip or gradual mix: Use drip acclimation for sensitive species; gradual mix for hardy fish.
- Monitor post-transfer: Observe breathing, color, and behavior for several hours and test water parameters regularly.
With stable parameters and calm fish you can resume normal feeding and expect the tank to recover to pre-move stability over the following days.
What Are Common Questions and Tips About Moving Fish and Aquariums?
Owners often ask how long fish can survive in bags or buckets, whether movers will transport live animals, and what to do if delays happen. Survival depends on container type, oxygen, temperature, and species: oxygen-flushed bags can keep fish safe for several hours, while aerated buckets may extend survival to a day or more with proper care. Movers typically transport empty tanks and equipment but not live animals; plan who is responsible for fish and prepare backups like portable aerators, extra batteries, and planned stops with power access for long trips. These tips cover common emergencies and help you prepare sensible contingencies.
How Long Can Fish Survive in Transport Bags or Buckets?
Times vary: oxygen-flushed bags commonly support fish for 2–6 hours depending on temperature and stocking density, while aerated buckets with good oxygen and temperature control can sustain many species for 12–24 hours or longer. Signs of oxygen stress include rapid gill movement, lethargy, or gasping at the surface; if you see those, stop safely, add aeration, and allow for water exchange when possible. For long travel, plan aeration, temperature control, and short rest stops to top up oxygen and reduce stress. These limits help you choose between bags or buckets and plan timing with movers.
Do Movers Typically Handle Live Fish or Only Empty Tanks?
Most professional movers will handle empty tanks, stands, and heavy equipment but avoid transporting live animals because of liability and welfare concerns; they will, however, protect and move fragile empty glass and related gear. Best practice is for owners to transport fish themselves in prepared containers or to hire a licensed pet transport specialist for complicated relocations. Mountain Movers ATX offers residential and packing services and can safely handle empty aquariums and heavy lifting, making them a practical partner while owners manage live-fish transport.
- Mover role: Secure and transport empty tanks and equipment.
- Owner role: Prepare, transport, and care for live fish during transit.
- Coordination tip: Communicate the tank loading order and timing with movers ahead of move day.
These guidelines answer common questions and complete the practical checklist for relocating fish and aquariums safely.
Conclusion
Moving fish and an aquarium safely comes down to preparation, careful packing, and slow, controlled acclimation. Follow the steps here to keep water quality steady and reduce stress on your aquatic pets. If you’d rather hand off the heavy and fragile items, Mountain Movers ATX is ready to help with reliable packing, transport, and transparent pricing — so you can concentrate on your fish and a smooth transition to your new home. Reach out to learn more or review our moving tips and resources.