
Kitchen Packing Guide for Moving


How to Pack Your Kitchen for a Move: A Practical, Stress‑Free Guide
Packing a kitchen is often the trickiest part of a move — fragile dishes, heavy cans, appliances with cords and fluids, and even transporting fish if you have an aquarium all add complexity. This guide walks you through decluttering, inventorying, and cleaning before packing; what supplies to buy or reuse; and reliable methods for wrapping dishes, nesting cookware, and prepping appliances safely. You'll also get a pantry plan that separates perishables from non‑perishables and a prioritized "open‑first" essentials box for your first night. Practical checklists, comparison tables, and simple step‑by‑step fragile‑item techniques make this feel manageable. And if you'd rather outsource the heavy lifting, we explain when hiring professional kitchen packing services in Austin makes sense and what to expect when you request a free quote — including local, transparent options to consider.
What Are the Essential Steps to Prepare Your Kitchen for Moving?
Start with a clear, repeatable sequence: declutter, inventory, clean, then schedule packing in stages so fragile and heavy items are handled correctly. Removing unwanted items first cuts your load, lowers cost and risk, and makes labeling and logistics simpler. The result: faster packing and easier unpacking because you only move what you plan to keep. Below is a short, actionable checklist that sets you up to pick the right supplies and packing methods for your kitchen.
The core steps below work best when followed in order to reduce last‑minute stress.
- Declutter by category and decide whether to keep, donate, or discard each item.
- Inventory and photograph valuable or sentimental pieces for records.
- Clean appliances, cabinets, and cookware before packing.
- Spread packing tasks across days and assign simple roles to helpers.
Following this order reduces surprises and ensures cleanup and documentation happen before boxes are sealed. Next, we cover targeted decluttering and inventory tips.
How Do You Declutter and Organize Kitchen Items Before Packing?

Decluttering is about quick, consistent decisions. A simple rule: if you haven’t used it in 12 months, consider donating or selling it; if it’s broken or unsafe, toss it. Sort items into four labeled piles — keep, donate, sell, trash — and work one category at a time, starting with duplicates and rarely‑used gadgets, then tackle pantry items. Test small appliances and keep only what you use; boxed or seldom‑used machines often sell easily and can offset moving costs. This reduces your packing volume and creates a cleaner inventory, which leads naturally to photographing and documenting the items you keep.
Documenting what you keep makes claims and unpacking easier, so plan your inventory and cleaning next.
What Should You Clean and Inventory Before Packing Your Kitchen?
Focus cleaning and documentation on items that are hard to inspect later: inside appliances, cabinet interiors, and high‑value cookware or specialty glassware. Make a simple inventory sheet with columns for item, condition notes, and photo filename; use your phone to date‑stamp photos for insurance or claims. Deep‑clean the refrigerator, oven, and dishwasher to prevent pests and odors in transit; empty fluids to avoid leaks. Save receipts for recent purchases and attach them to your inventory notes to help with any future claims. Photos plus short descriptions speed resolution if damage occurs after the move.
With cleaning and inventory done, you’ll be ready to choose the right packing supplies and methods.
Which Packing Supplies Are Best for Safely Moving Kitchen Items?

Packing materials and box sizes directly affect weight, protection, and how easy boxes are to handle. Use small boxes for heavy items like canned goods, medium boxes for lighter kitchenware and small appliances, and dish packs or partitioned kits for plates and stemware. Packing paper, bubble wrap, foam sheets, and dish dividers each serve a role — paper for surface protection, bubble for shock absorption, foam for end protection — and tools like quality tape, markers, and stretch wrap keep boxes sealed and labeled. Investing in the right mix of boxes and cushioning reduces damage risk and makes loading and unloading more predictable.
Below is a quick comparison to help you estimate box types and counts for an average kitchen.
Intro: This table compares common box types and their best uses so you can plan quantities and pack more efficiently.
Summary: Keep heavy items in small boxes so lifts stay manageable, use medium boxes for mixed loads, and reserve dish packs for fragile tableware. Adjust counts for your household size.
Also consider eco‑friendly options like reusable plastic bins or rented dish packs to reduce waste and sometimes save money. Next, learn how to use your materials to build layered protection and avoid common mistakes.
What Types of Boxes and Materials Are Needed for Kitchen Packing?
Pick boxes based on weight capacity and internal protection to keep fragile items safe and reduce injury risk during handling. Small double‑walled boxes work well for dense items; medium boxes are versatile for lighter kitchenware and small appliances. Dish pack boxes with partitions prevent plates and glasses from touching. When possible, use reusable plastic bins for utensils and pantry items and save towels or linens for padding — it’s budget‑friendly and eco‑smart. Having the right mix of box sizes before you start prevents last‑minute supply runs.
With boxes chosen, the next section explains the best way to use packing paper, bubble wrap, and tape.
How Do You Use Packing Paper, Bubble Wrap, and Tape Effectively?
Packing paper and bubble wrap work together: paper protects finishes and prevents scratches; bubble wrap soaks up impact. Start with a cushioning base in each box, wrap fragile items individually in paper, and add bubble wrap for extra protection on delicate pieces like stemware or glass lids. Use foam sheets or dividers inside dish packs to separate plates vertically, and leave 1–2 inches at the top of each box for padding — don’t overfill. For tape, use an H‑pattern on the box bottom with two strips across the center and reinforce seams. Clearly mark fragile boxes and add orientation arrows to guide handlers. Layering this way minimizes movement and lowers breakage risk in transit.
Mastering these wrapping basics leads straight into step‑by‑step fragile‑item methods below.
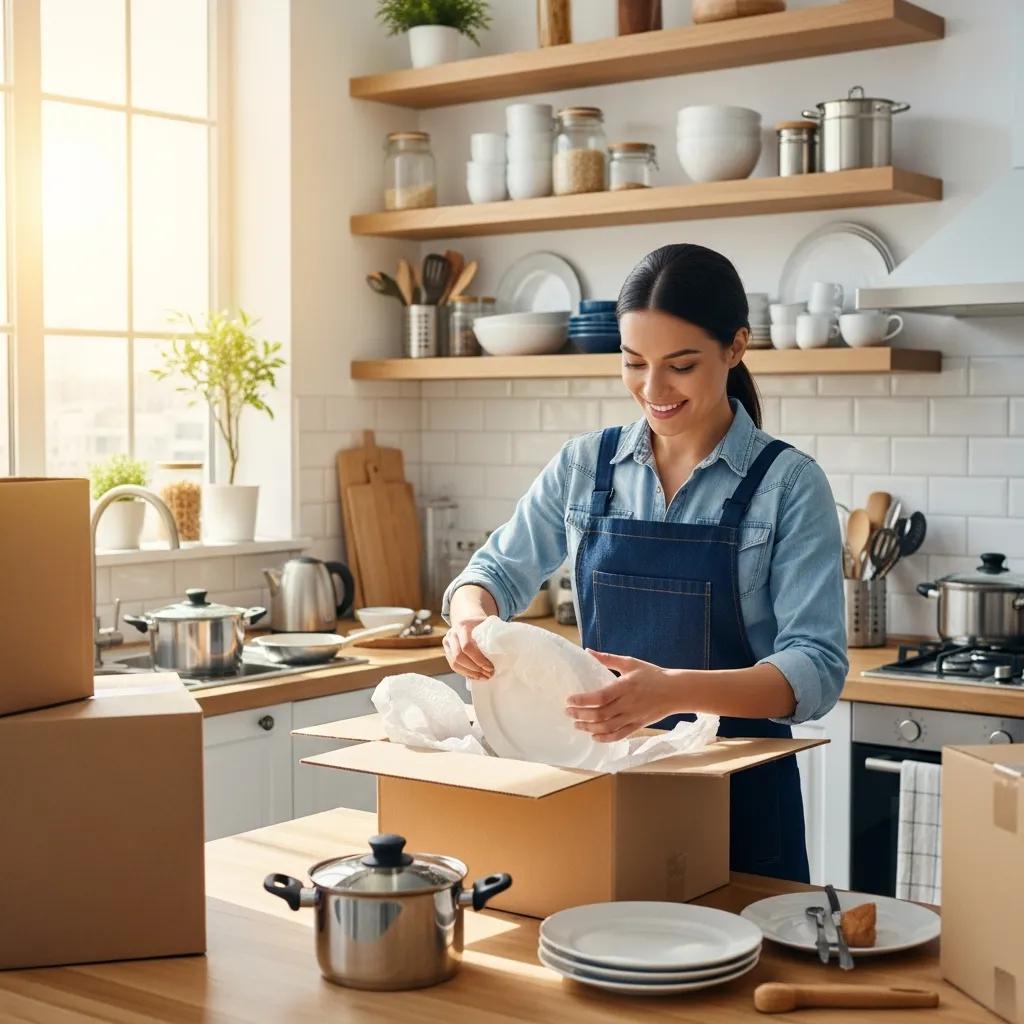
How Do You Pack Fragile Kitchen Items Like Dishes and Glassware?
Packing fragile kitchenware calls for a calm, repeatable routine: wrap, cushion, box (often vertically), and label so handlers know which boxes need extra care. The key to preventing breakage is eliminating movement — secure each item so it can’t shift, and place plates on edge to spread pressure along the rim instead of across the face. Properly packed fragile boxes mean fewer broken pieces and less stress on moving day; clear labels help movers keep those boxes on top. Here’s a short, easy sequence you can follow.
- Create a cushioned base in a sturdy box with crumpled paper or foam.
- Wrap each plate or bowl in paper, stand plates on edge, and use dividers for stability.
- Wrap glasses individually, use stem protectors, and nest cups with paper between.
- Fill empty spaces, seal the box, and label it "KITCHEN - FRAGILE - TOP" with orientation arrows.
These steps limit shock exposure and guide loading decisions. After this, decide whether fragile‑item packing is something you’ll handle or hire out; many people bring in pros for heirlooms or when time is tight. Mountain Movers is a family‑owned moving company serving Austin and Central Texas that offers Austin Packing Services. We stand by transparent pricing with no hidden fees, professional movers who treat your things with care, and a clear commitment to customer satisfaction. GET A FREE QUOTE or CALL (737) 230-6190 to learn how professional fragile‑item packing can save time and reduce loss risk.
What Are the Best Techniques for Wrapping and Cushioning Fragile Items?
Start with paper to protect delicate finishes, add bubble wrap for shock absorption, then use padding or dividers to lock items in place. For plates: one sheet of paper, then stand them vertically with cushioning between edges. For stemware: stuff bowls with paper, wrap stems in bubble wrap, and place each glass in a partitioned cell or wrap in towels for extra support. Use linens as secondary padding for mixed boxes to fill gaps and reduce movement. These strategies protect fragile pieces while cutting down on extra materials by using what you already own.
Good wrapping naturally leads to careful labeling and truck arrangement so fragile boxes stay protected.
How Should You Label and Arrange Boxes Containing Fragile Kitchenware?
Clear labels make handling and truck placement simple: mark boxes "KITCHEN - FRAGILE - ROOM - CONTENTS," add orientation arrows, and note approximate weight. Flag the heaviest boxes so loadmasters can stack safely and mark "TOP" on boxes that must stay above others. When loading, place fragile boxes on top of sturdy boxes and toward the front of the cargo area to limit shifting. Color‑coded stickers or bright labels help identify boxes that should be unloaded first. This system reduces handling errors and protects breakables during the move.
With labeling settled, next focus on appliances and cookware — preparing and organizing these items prevents damage to larger pieces.
What Are the Best Practices for Packing Kitchen Appliances and Cookware?
Packing appliances and cookware means clearing fluids, securing loose parts, and picking the right packing method to avoid dents or internal damage. Appliances should be unplugged, cleaned, and protected; cookware benefits from nesting with soft barriers. Manage cords, keep small accessories in labeled bags, and secure doors on refrigerators or dishwashers. The table below gives appliance‑specific prep steps and packing notes so you can act confidently whether you box items or move them unboxed.
Intro: The table below lists common kitchen appliances, recommended prep steps, and packing notes so you can prioritize safety and efficiency.
Summary: Follow appliance‑specific prep to avoid leaks, electrical issues, or cosmetic damage. If you’re unsure about large or fluid‑filled appliances, professional handling is a safe choice.
Next, we cover how to prepare small and large appliances and when hiring pros makes sense.
How Do You Prepare and Secure Small and Large Kitchen Appliances?
Unplug and completely dry electrical appliances, then remove or secure loose components like trays and attachments. Defrost refrigerators 24–48 hours before moving, clean interiors, and tape doors or use moving straps to prevent swinging. Wrap blenders, coffee makers, and similar appliances in bubble wrap and pack in medium boxes with padding; bundle cords and tape them to the unit. For appliances with fluids (dishwashers, ice makers), drain lines and follow manufacturer instructions — when in doubt, schedule a pro for disconnection or heavy lifts to avoid damage or injury.
Proper appliance prep reduces the chance of problems on arrival and leads into cookware nesting tips that save space and protect finishes.
What Is the Recommended Method for Nesting and Padding Pots and Pans?
Nesting pots and pans saves space and keeps surfaces safe when you place a soft barrier between pieces — paper or a thin towel works well. Stack like sizes together with the heaviest pan on the bottom and finish with a padded lid or foam sheet. Bag handles separately or tape them down to avoid scratches. Store lids vertically along one side of the box with paper or foam between them, and consolidate lids in a labeled bag taped to the box exterior so they’re easy to find. Using kitchen linens as padding is eco‑friendly and cuts material costs.
Once cookware is nested and secure, move on to pantry planning and assembling an essentials box so your kitchen works on day one.
How Do You Organize Pantry Items and Create a Kitchen Essentials Box?
A pantry plan separates perishables from sealed non‑perishables and includes an "open‑first" essentials kit for moving day so you don’t have to hunt through boxes. Consume or donate perishables before the move; frozen items can go in coolers or be donated if needed. Pack canned goods and jars in small boxes with padding. Your essentials box should hold basics — coffee, utensils, one pot and pan, plates, cups, cleaning supplies, and a small tool kit — so you can cook and clean right away. Below is guidance for handling food items and a checklist for the open‑first box to keep routines steady during the transition.
Organizing pantry items early reduces waste and keeps your new kitchen functional from night one.
What Should You Do with Perishable and Non-Perishable Pantry Goods?
Create a consumption plan for perishables: use up fresh produce and dairy before moving day, transfer frozen items in coolers, or donate what you can. Pack non‑perishables like canned goods in small boxes to keep weights manageable and cushion jars with paper. Label food boxes with contents and expiration dates to simplify decisions on arrival. Donating unopened non‑perishables to local charities also reduces your load and helps the community.
Cutting pantry volume ahead of time avoids last‑minute tossing and ties into assembling your essentials box.
What Items Belong in the 'Open First' Kitchen Box for Moving Day?
Your "open‑first" box should contain the small set of items you need for immediate cooking and cleanup so the kitchen is usable without unpacking everything. Pack a coffee or tea kit, a few plates and cups, utensils for each person, one pot and one pan, a cutting board, a can opener, dish soap, sponges, trash bags, and a small toolkit (screwdriver, pliers). Use an easy‑to‑carry box or plastic bin and label it "OPEN FIRST - KITCHEN" so movers and family know to keep it accessible. This keeps your first night simple and lets you unpack the rest at a comfortable pace.
With essentials ready, the last big choice is DIY versus hiring professionals — the next section helps you decide.
When and Why Should You Hire Professional Kitchen Packing Services in Austin?
Professional kitchen packing is a smart choice when you’re short on time, have valuable fragile collections, or face heavy or complex appliances. Trained packers use industry‑standard materials and techniques that minimize movement and distribute weight properly, which cuts damage risk and speeds the job. Pros are especially useful for large households, antiques, or when you want a turnkey solution so you can focus on other moving details. The table below compares DIY and professional packing across time, risk, and best scenarios to help you choose.
Intro: This table compares DIY packing versus hiring professionals so you can weigh time, cost, and risk for your kitchen move.
Summary: Professionals reduce damage risk and save time on complex moves. A hybrid approach balances budget and protection for targeted needs.
After weighing your options, here’s how Mountain Movers can help Austin and Central Texas movers. Mountain Movers is a family‑owned moving company based in Austin, TX serving Central Texas that provides local, long‑distance, residential, and commercial moves and offers Austin Packing Services. We emphasize transparent pricing with no hidden fees, reliable movers who treat your belongings with care, and a commitment to customer satisfaction. GET A FREE QUOTE or CALL (737) 230-6190 to discuss packing options and scheduling.
How Can Mountain Movers Help Make Your Kitchen Move Stress-Free?
We bring local experience and a practical service focus to kitchen moves: our Austin Packing Services include experienced packers who know how to wrap fragile items, secure appliances, and load trucks to avoid pressure on delicate boxes. As a family‑owned company serving Central Texas, we offer transparent pricing, careful handling, and clear communication to minimize surprises. If you hire us, expect an initial walkthrough or estimate that defines scope and timeline so appliance disconnects and scheduling are coordinated. Requesting a quote gives you a clear plan for arrival time, supplied materials, and how we’ll prioritize fragile or complex items.
This local support option leads to the immediate benefits of requesting a free quote before your move.
What Are the Benefits of Requesting a Free Quote for Kitchen Packing Services?
A free quote gives cost clarity and a clear work plan, so you can compare DIY vs. pro costs and see what’s included. An itemized estimate reduces budgeting surprises by listing tasks, materials, and time, and it highlights which parts are best left to professionals. A quote also sets timing so you can arrange appliance service, cleaning, and parking or elevator access. Getting a quote early gives you the information you need to decide on full packing services, a hybrid approach, or doing it yourself. If you choose Mountain Movers, remember we offer transparent pricing, careful handling, and a local Austin focus — GET A FREE QUOTE or CALL (737) 230-6190 to get started.
Conclusion
Packing your kitchen doesn’t have to be chaotic. With a clear plan, the right supplies, and a few reliable techniques, you can protect fragile items and keep essentials within reach. Whether you handle packing yourself or hire pros, the key is to plan ahead and stay organized. For a smoother move in Austin and Central Texas, consider reaching out to Mountain Movers for a free quote today.